The wet-on-wet watercolor technique is a fundamental skill that both beginners and experienced artists strive to master. However, it can be quite a challenge to achieve the desired results. In this blog post, we will explore the intricacies of this technique, discuss its advantages and pitfalls, and provide valuable tips to help you create stunning watercolor paintings with confidence.
So what is wet on wet watercolor technique anyway?
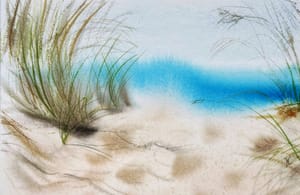
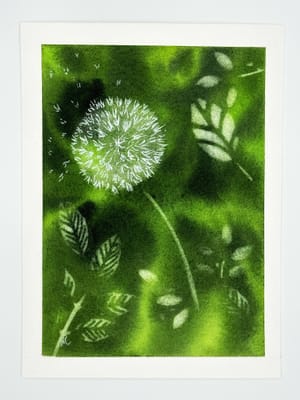
Imagine a canvas where the paint dances freely, creating soft edges and beautiful color graduations. That's the essence of the wet-on-wet watercolor technique. To execute this method, you wet the paper before applying the paint, allowing the wet watercolor pigments to blend and flow across the canvas.
The Good: Endless Creative Possibilities
The wet-on-wet technique offers a plethora of creative opportunities. It allows you to effortlessly create a range of effects, from dreamy washes to delicate textures. The fluid and unpredictable nature of this technique can lead to happy accidents, unexpected blends, and magical interactions between colors. Embrace the spontaneity and enjoy the journey as you explore the endless possibilities it offers.

The Bad: Taming the Unpredictable
With great freedom comes a degree of unpredictability. The wet-on-wet technique can sometimes feel like taming a wild horse. The lack of control over the paint's behavior challenges artists to find a delicate balance between letting go and guiding the flow. It requires patience and practice to develop an intuitive sense of timing and to anticipate the paint's behavior.
The Ugly: Battling Blooms
One of the biggest challenges in the wet-on-wet technique is dealing with backruns, also known as blooms or cauliflowers. These unintended textures occur when fresh paint encounters partially dried areas, disrupting the smooth transitions artists strive for. However, with the right approach, you can minimize or even eliminate these undesired effects.

Tips for Achieving Smooth Transitions:
- Saturation is Key: Ensure your paper is sufficiently wet to extend the working time before it starts to dry. A more saturated surface allows you to apply colors without the risk of premature drying.
- Preparing Ahead: Before you begin painting, take the time to prepare your paints and mix puddles of the colors you plan to use. This way, you can focus solely on painting without wasting precious moments mixing pigments while your paper dries.
- Blot and Control: Regularly check for excess moisture on your paper. If you notice puddles or pooling water, use a thirsty brush or a piece of paper towel to soak it up. By maintaining control over the moisture on your canvas, you can prevent backruns from occurring.
- Choosing the Right Paper: Consider using 100 percent cotton cold-pressed paper, which has a toothy texture that retains moisture for a longer duration compared to smoother papers. The paper's absorbency can work in your favor, allowing you to manipulate the paint and achieve desired effects.
- Practice Makes Perfect: Like any skill, mastering the wet-on-wet technique requires practice. Experiment with different brush and paper dampness levels to strike the perfect balance. As you gain experience, you'll develop a feel for how much moisture your brush and paper can hold, ultimately avoiding backruns and achieving smooth transitions.

The different levels of Paper wetness and safe zones can be compared to nail polish!

Embrace the Adventure of Wet-on-Wet Watercolor
While the wet-on-wet watercolor technique may present challenges, it also offers a thrilling and rewarding artistic adventure. Embrace the fluidity, explore the vibrant interactions of colors, and let your creativity flow. With practice, patience, and a willingness to experiment, you'll unlock the full potential of this technique and create breathtaking watercolor paintings that truly reflect your artistic abilities.


