Watercolor painting is a versatile and expressive medium that allows artists to create stunning effects using various techniques. One such technique is using stencils to achieve captivating bokeh effects in your artwork. By repurposing old stencils that you have lying around, you can add a touch of uniqueness to your paintings while exploring the enchanting world of light and texture.
The bokeh effect, often seen in photography, refers to the soft, out-of-focus background that creates a mesmerizing blur of light. Translating this effect into watercolor painting can bring a sense of depth, atmosphere, and visual interest to your artwork. With stencils, you can easily achieve this effect by selectively lifting paint in desired areas, creating soft, ethereal shapes reminiscent of bokeh.
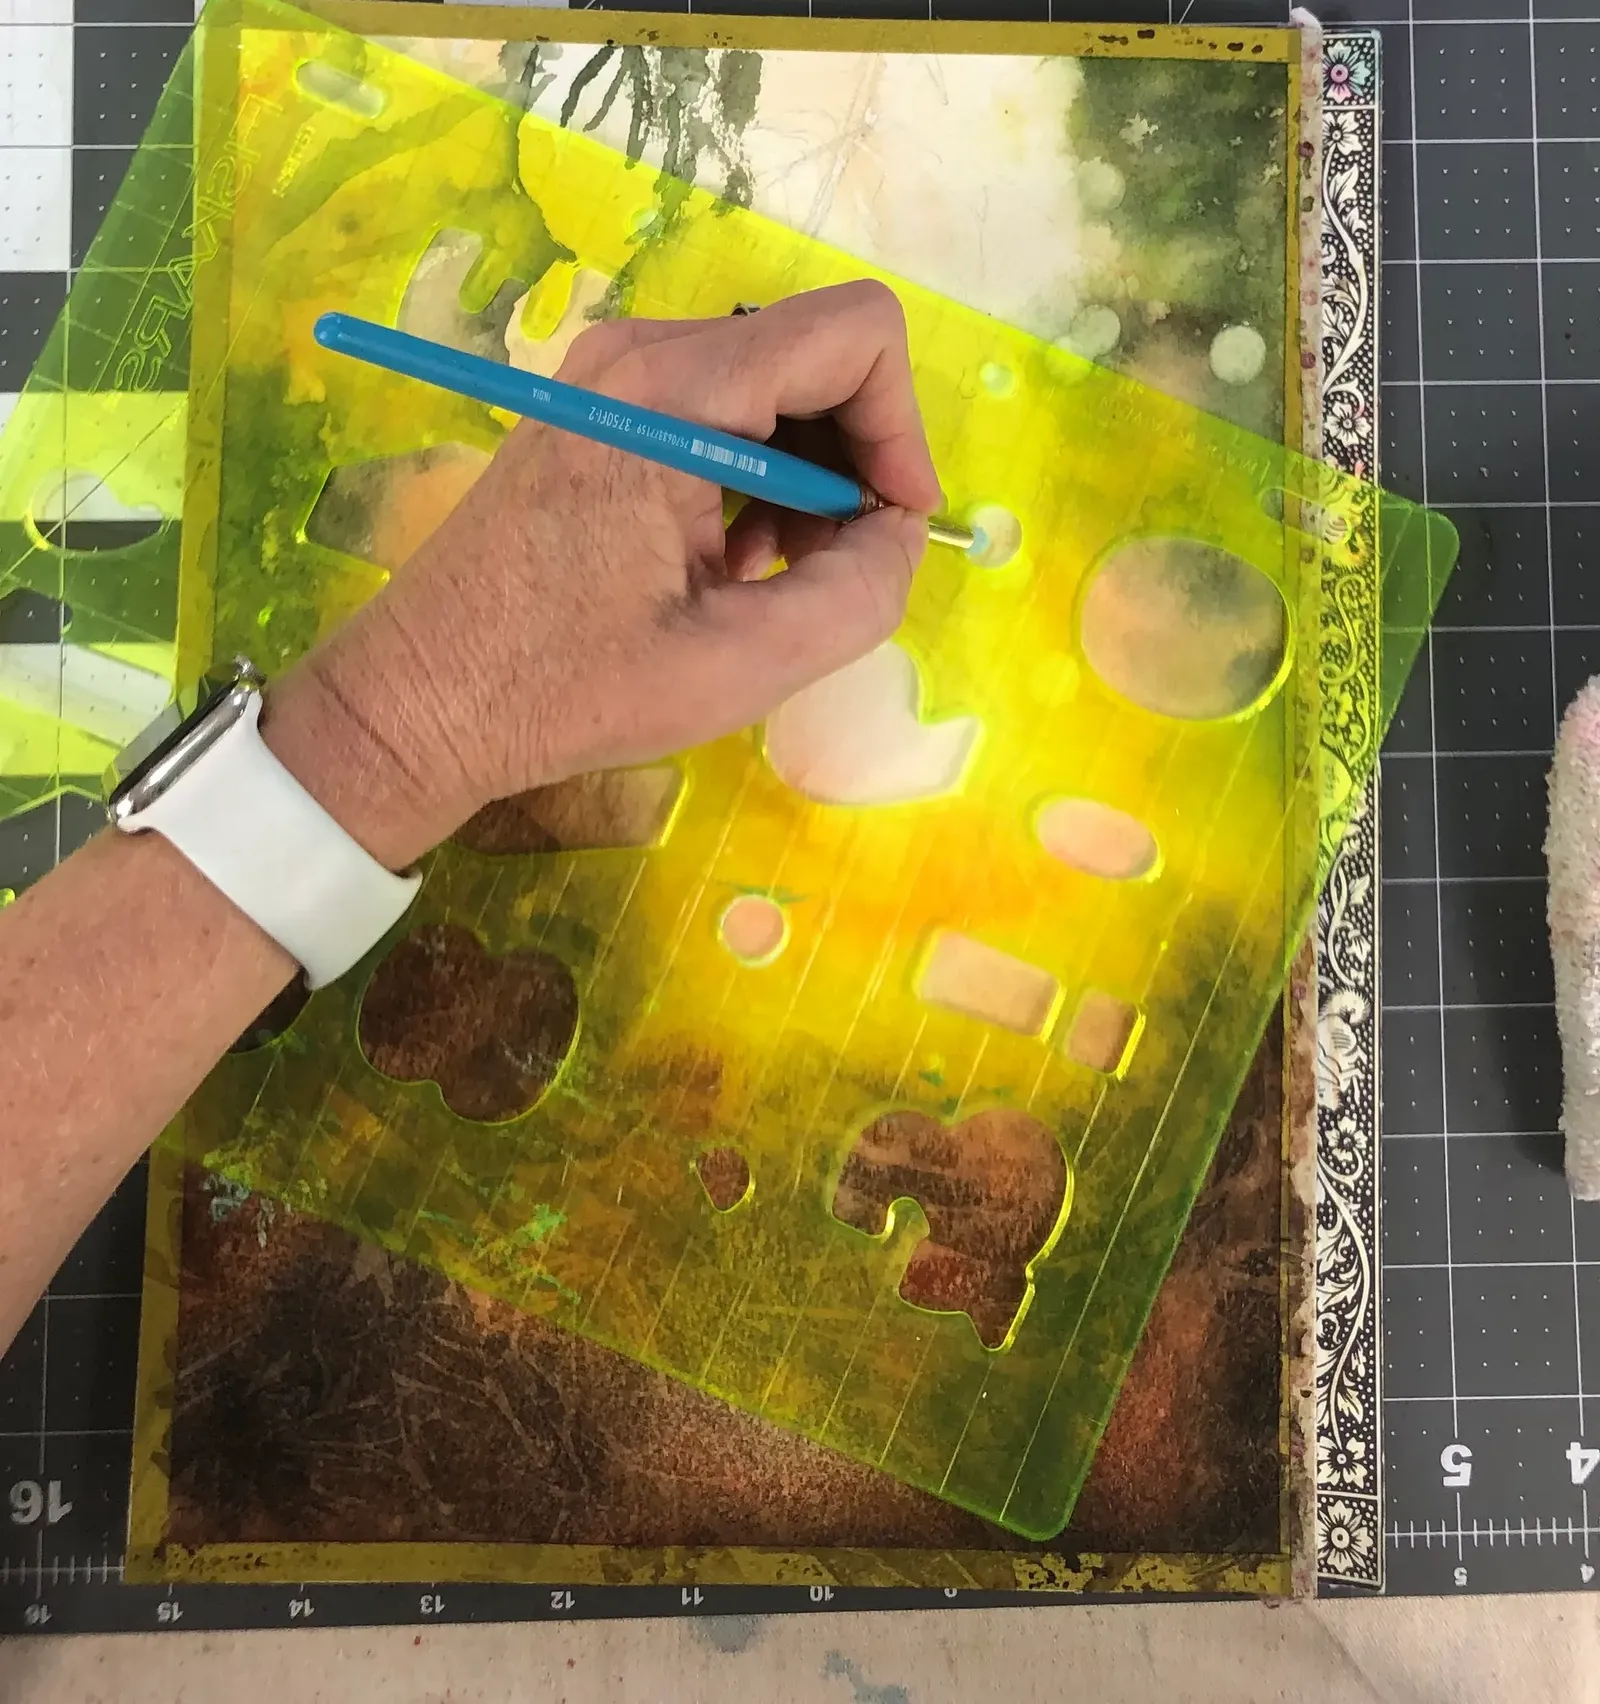
To begin, choose the stencil that best complements your subject matter. Flowers, leaves, or any other nature-inspired shapes work particularly well for this technique. Place your stencil where you want to lift the paint.
Next, dampen a stiffer brush slightly, making sure it is not too wet. Gently scrub over the areas within the stencil, allowing the bristles to lift the paint from the paper's surface. By varying the pressure and stroke of your brush, you can control the amount of paint lifted and create a range of tonal values. Experimenting with different brushes and their textures can yield intriguing results, adding depth and dimension to your artwork.
For more pronounced lifting effects, you can blot the wet areas with a tissue or sponge. By applying gentle pressure, you can remove additional paint and create lighter tones or even achieve a layered effect by repeating the process with different colors. This layering technique allows you to build up complexity and depth within your composition, mimicking the captivating interplay of light and shadow found in bokeh photography.
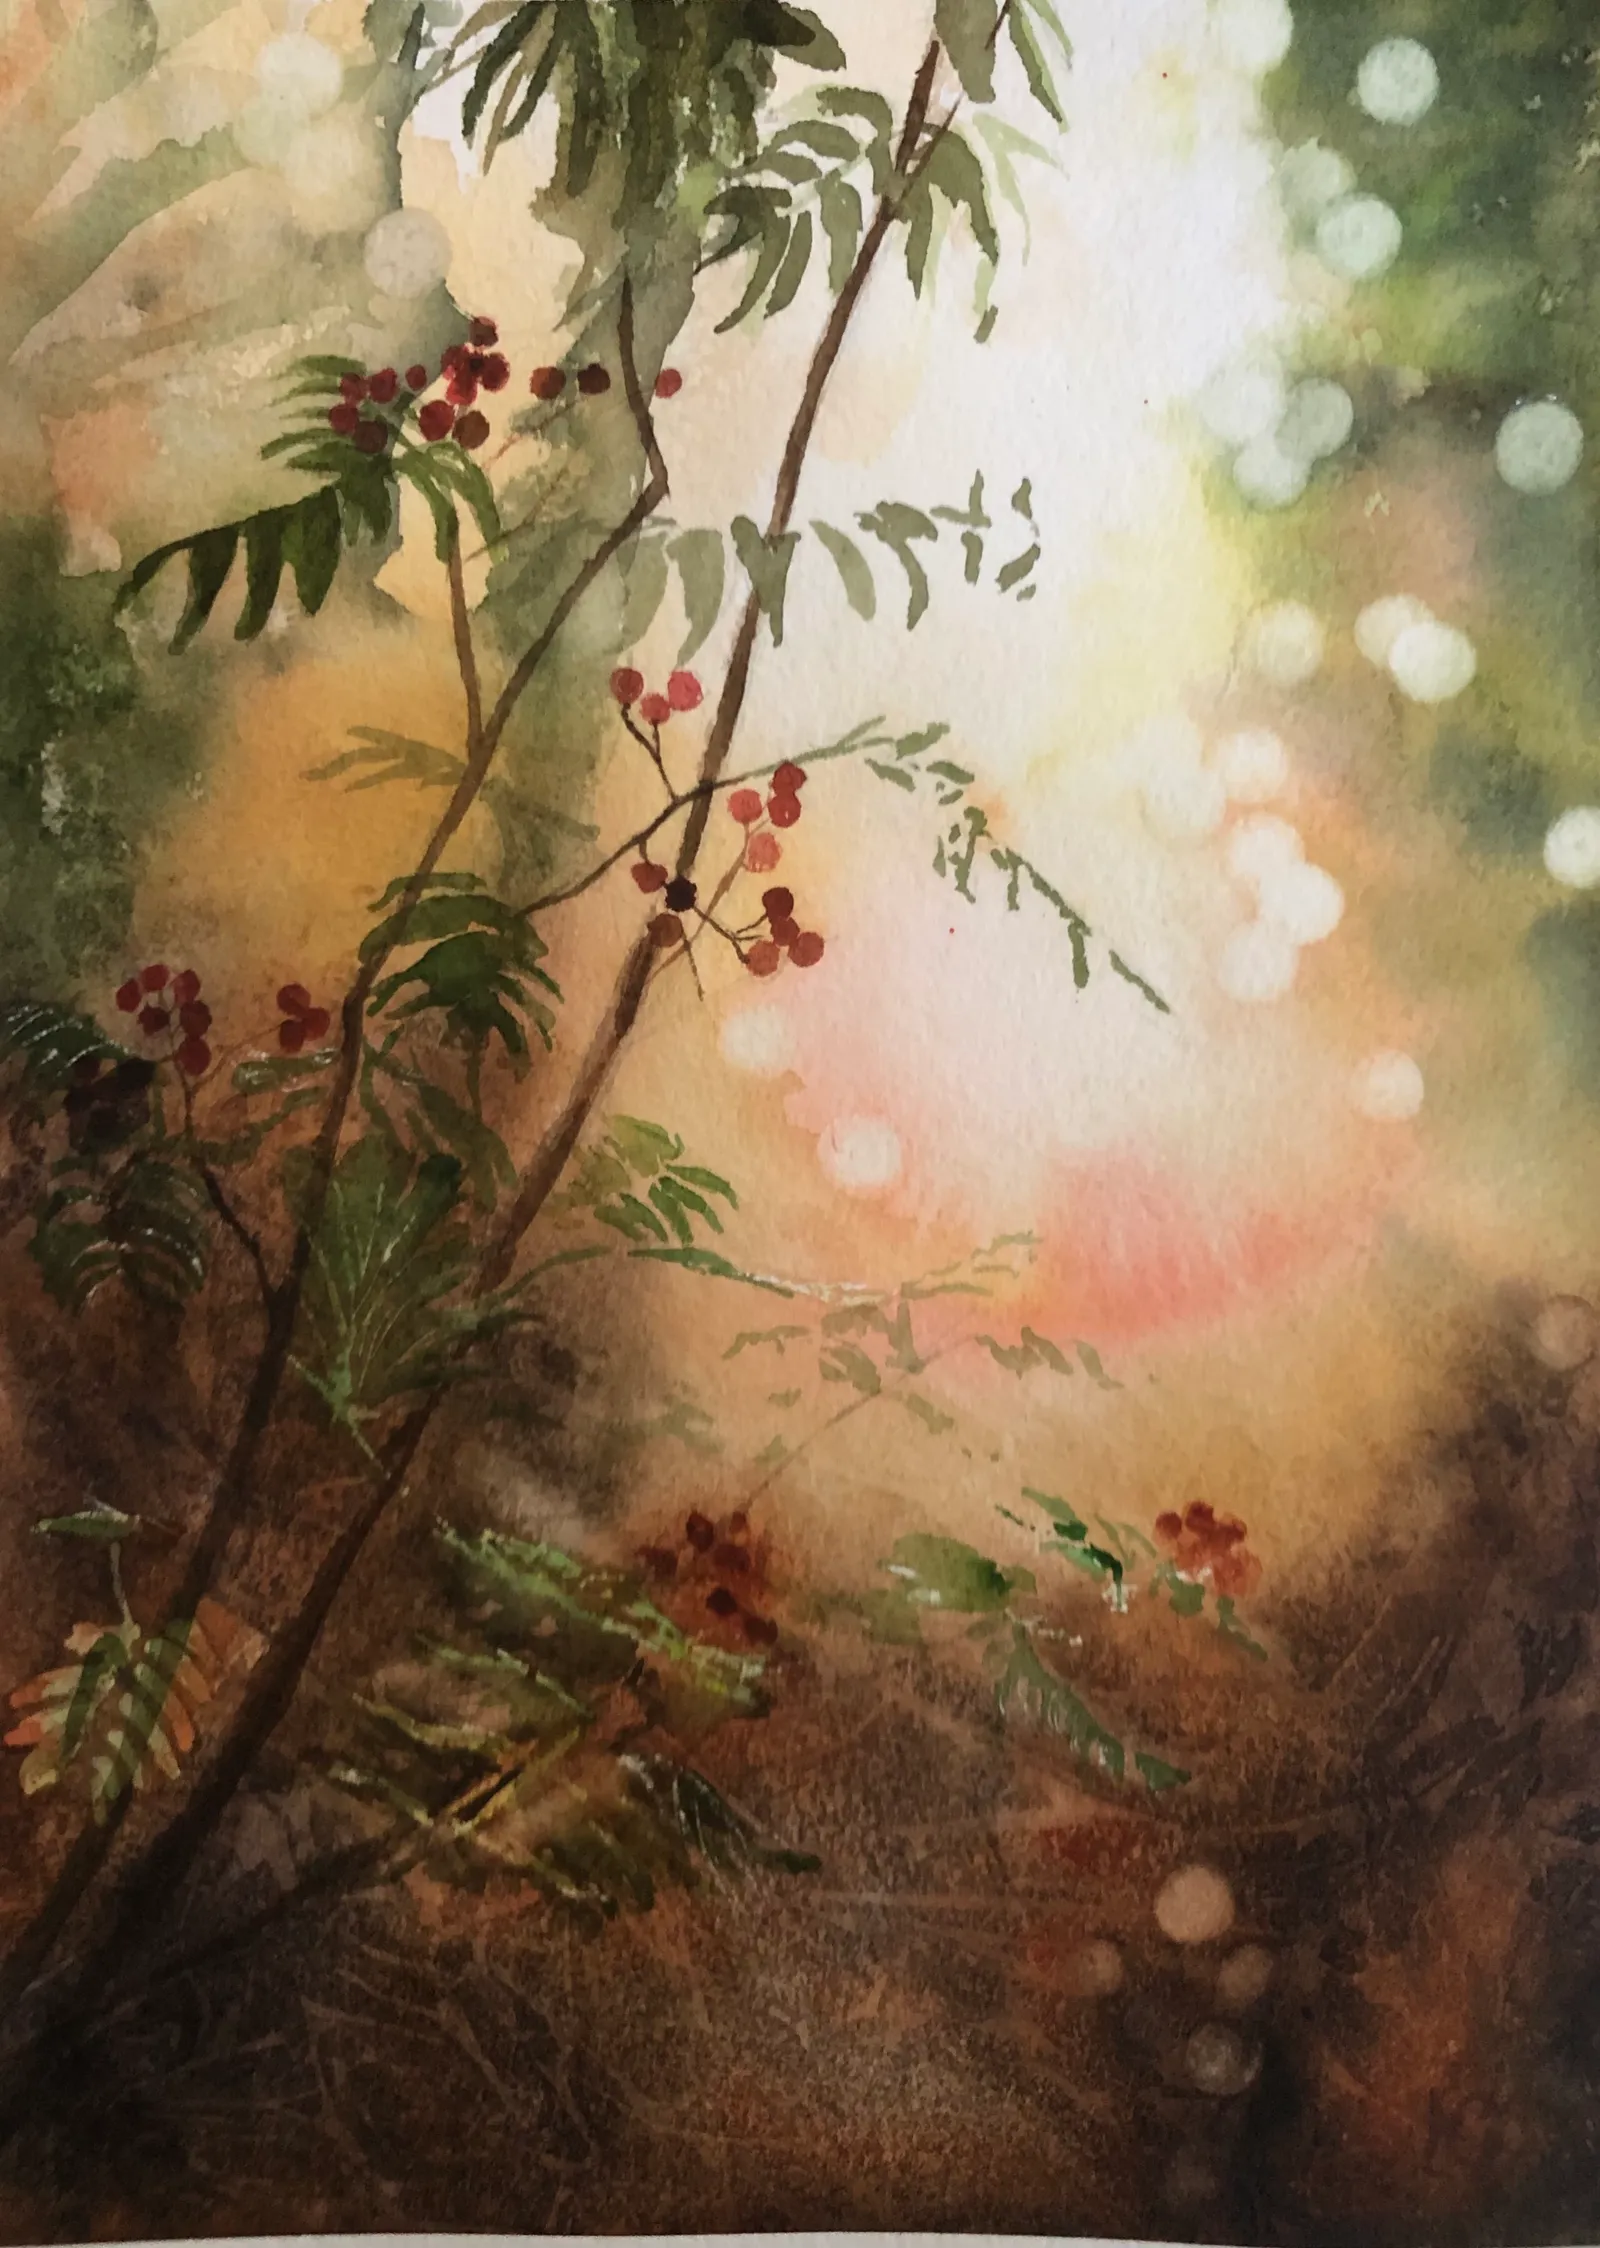
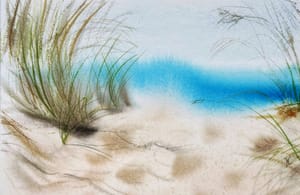
This is my final effect. I also used saran wrap for texture on the bottom darker area to mimic twigs and such in the forest. By crumpling the wrap and gently pressing it onto the wet areas, you can create intriguing textures that add an organic touch to your artwork.
I would love to hear your thoughts on this watercolor technique. Do you enjoy lifting paint as a watercolor technique? What are your favorite subjects to paint? Share your experiences and insights in the comments section below. Let's continue to explore the vast possibilities of watercolor painting together and inspire one another to create extraordinary works of art!
Supplies I used for this project:
Arches 140 lb cold pressed paper 9x12: https://amzn.to/3z0dhP3
Watercolor Paints: Sap green: https://amzn.to/3Jk05JGYellow ochre: https://amzn.to/3qouFJzBurnt sienna: https://amzn.to/3qvZSuCVandyke brown: https://amzn.to/30Yb8XPQuinacridone scarlet: https://amzn.to/3prRn4nNeutral tint: https://amzn.to/3H9puE6Quinacridone red: https://amzn.to/3Fu9kos
Holbein Watercolor Kits:
12 5 ml tubes: https://amzn.to/3Frc31L
18 5 ml tubes: https://amzn.to/3qlUY32
24 5 ml tubes: https://amzn.to/3Eqfy7t
Brushes: My favorite: Princeton Black Velvet series brushes: https://amzn.to/33MzDbkRound 8: https://amzn.to/3Jfijw3Round 2: https://amzn.to/3EmQvClFlat 3/4: https://amzn.to/3EM8tyfScrubbing brush for lifting: https://amzn.to/310Z9J2
Circular stencil: https://amzn.to/3H9Q8N8
Exacto knife: https://amzn.to/3mPeC6D
Water container I use: https://amzn.to/3Enrfvv
Plastic wrap and Salt.